final project: wireless connection
December 1, 2020
For one of the final parts of my final project, I needed to integrate a wireless way to activate my device. I plan on this when picking the microcontroller for my project -- the ESP32CAM. Like I noted before the ESP32CAM has built-in WiFi and Bluetooth which makes it possible to connect via a smartphone without any extra components. Now that I know I have the availability to do so, I started to do some research on how to connect the two.
bluetooth
The Bluetooth route was one I initially decided to go down. However, after doing
some research I realized that it would be difficult to build a web app that would
connect the live stream from my camera and to use the Bluetooth at the same time.
After doing some reading, it found that Bluetooth and Wi-Fi don’t co-exists very well
on the ESP32 because they share the same radio system. Therefore Bluetooth connection
needs to be closed as soon as the Wi-Fi connection starts to be used for data so it would
be hard to integrate my camera live stream that would be over Wi-Fi. However, this is
a path I wanted to dive down for the networking week assignment. So you can see more
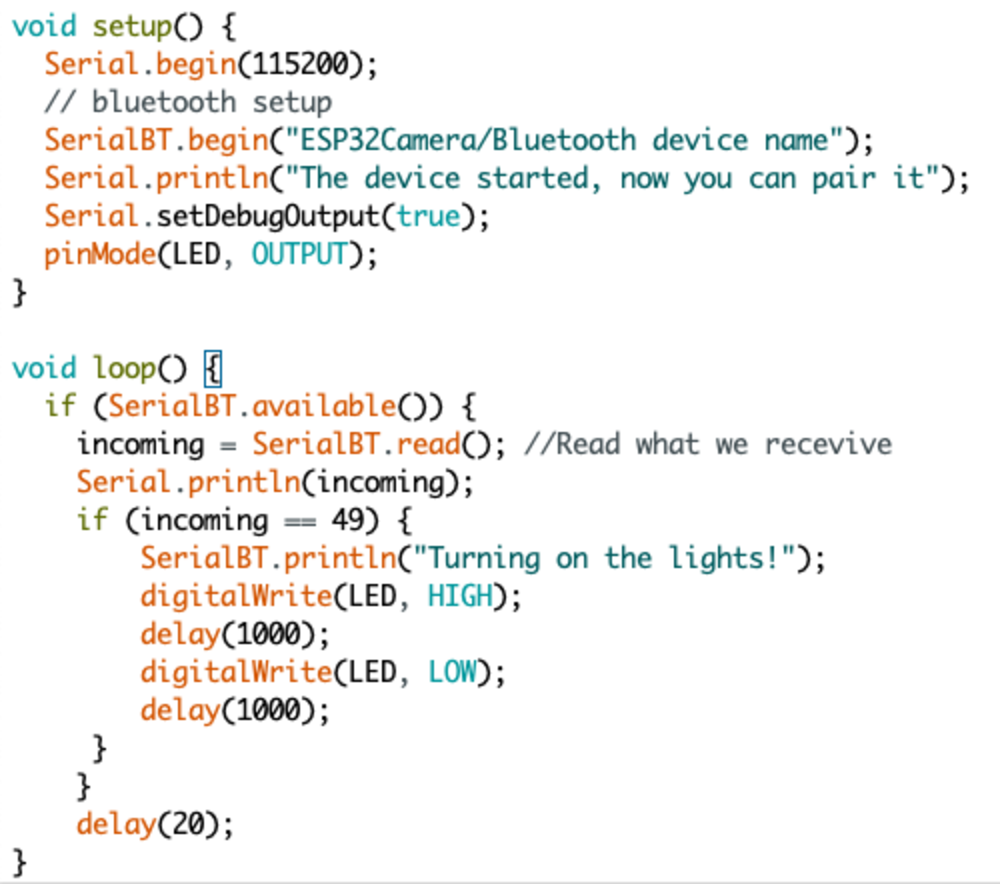
detail into what I did there. Ultimately, I used the `BluetooothSerial.h` package and
connected my smartphone to my device via Bluetooth by initializing a Bluetooth
connection, listening if Bluetooth was available, and performing certain actions
based on the response that I sent from my laptop. Now I was able to emulate the
physical button press by lighting up an LED on my PCB by using Bluetooth which was
super cool.

Initializing Bluetooth library

Bluetooth code
Turning on LED with Bluetooth Serial Terminal
blynk
After doing some additional research on what other people used to create their applications, I found that many people use the ESP32CAM with Blynk -- a hardware-agnostic IoT platform to create their web applications. This seemed to be exactly what I was looking for, however, this didn’t go along with the class philosophy of creating everything by scratch. Therefore I didn’t include this in my networking week assignment, but I plan to use this until I figure out a way to integrate the live stream video into a web application I can develop myself.
The nice thing about blynk and my application is that I don’t have many components that I wanted to show on my application. I just wanted to display the live stream from the ESP32CAM and a button to activate all of my mechanisms. Therefore the blynk side is very straightforward.
I first had to clone the ESP32 MJPEG Streaming Server code from github. This would allow me to use the live stream video from the ESP32CAM to the Blynk. After I did so, I had to enter in the right credentials for my WiFi (both network name and password) and I followed the protocol to code program the ESP32 (turn onto to programming mode, click the button, etc.). With this done and the ESP32 MJPEG Streaming Server code uploaded on the ESP32CAM, I could reach the local IP address to access the still images and live stream. To get the still image I would just enter in the IP address/jpg and to get the livestream I would just need to enter in the IP address/mjpeg/1.
Still image on local IP
Livestream on local IP
With this sorted away, I just needed to create my blynk project. To do so I created a new project, and added a video stream widget. I then entered the url for video streaming (IP address/mjpeg/1). I then added another widget that was connected to GPIO16 (the pin that is connected to the Button) and activated it when I wanted the mechanisms to start.
Blynk app setup -- making LED light up with button press on Blynk
This worked really well and now anyone on the network will be able to connect to the app, see my dog, and launch treats at her!
self-made interface
As an update, for the interface week I created my own web application that would activate all of the mechanisms with the press of the button on my web application. This was particularlly neat because I could control my ESP32CAM without any pins and just a simple HTTP GET request to my ESP32CAM. This is much more in the scope of the class, as I made this interface from scratch!
Interface week assignment -- web application that will activate mechanisms on button press
NEXT>