documenting use of the BBB
Jake designed the BBB and here I will record my process trying to use it...
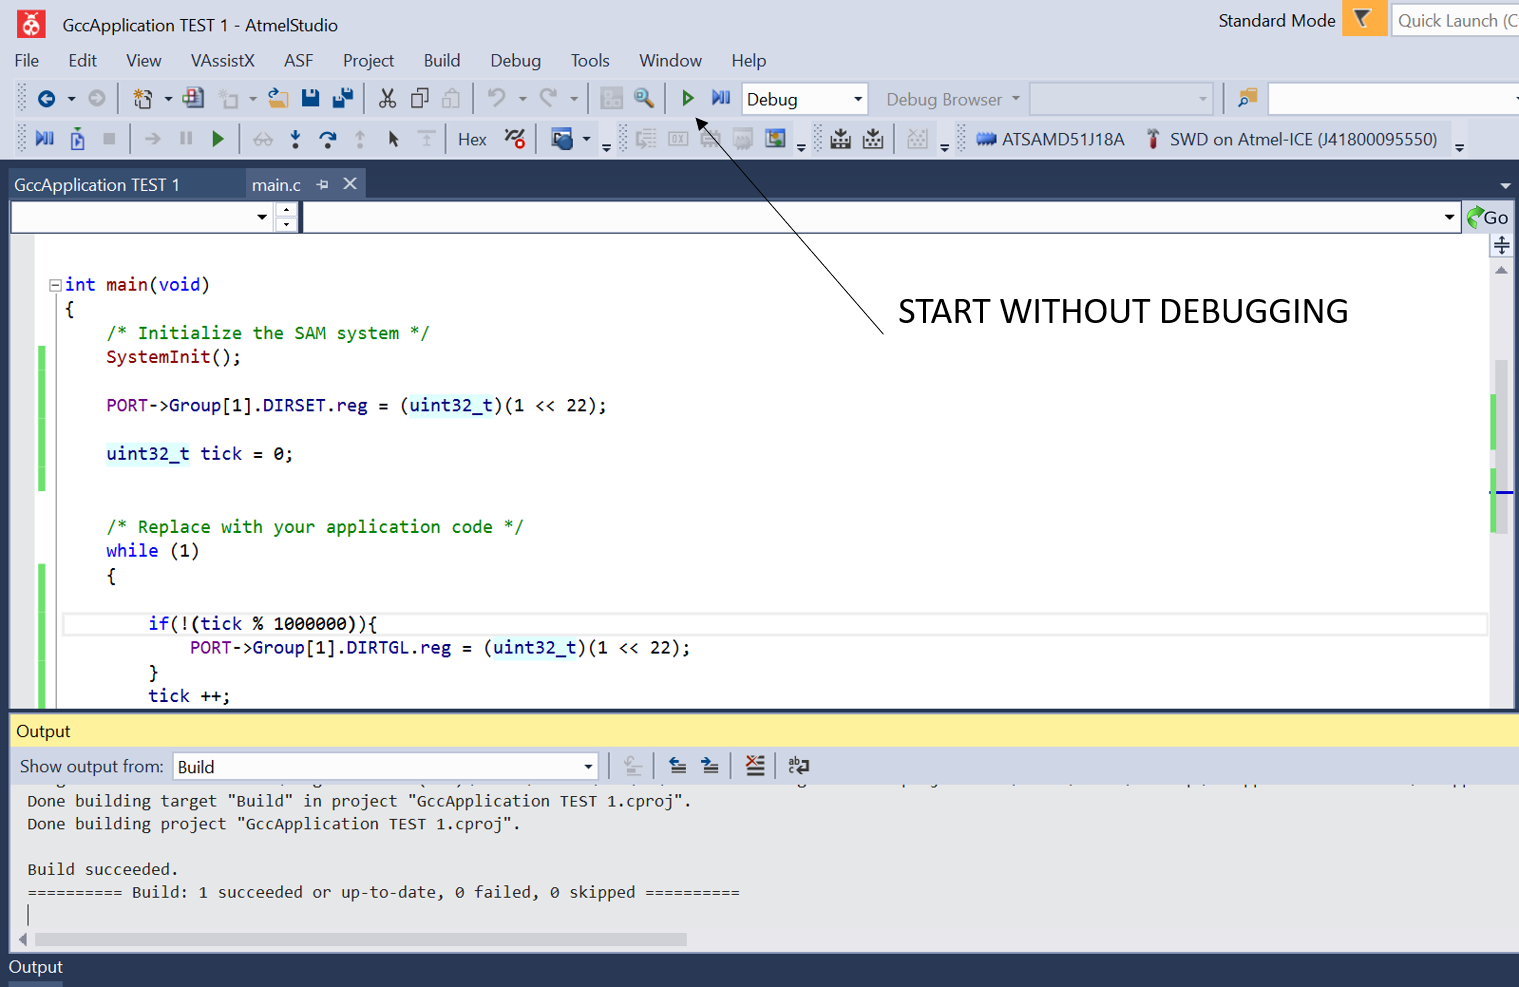
- First, download Atmel studio and start a New Project, GCC C Executable Project C/C++, Device Selection is ATSAMD51J18 (the chip on the BBB). Now there is an empty main.c file to test with.
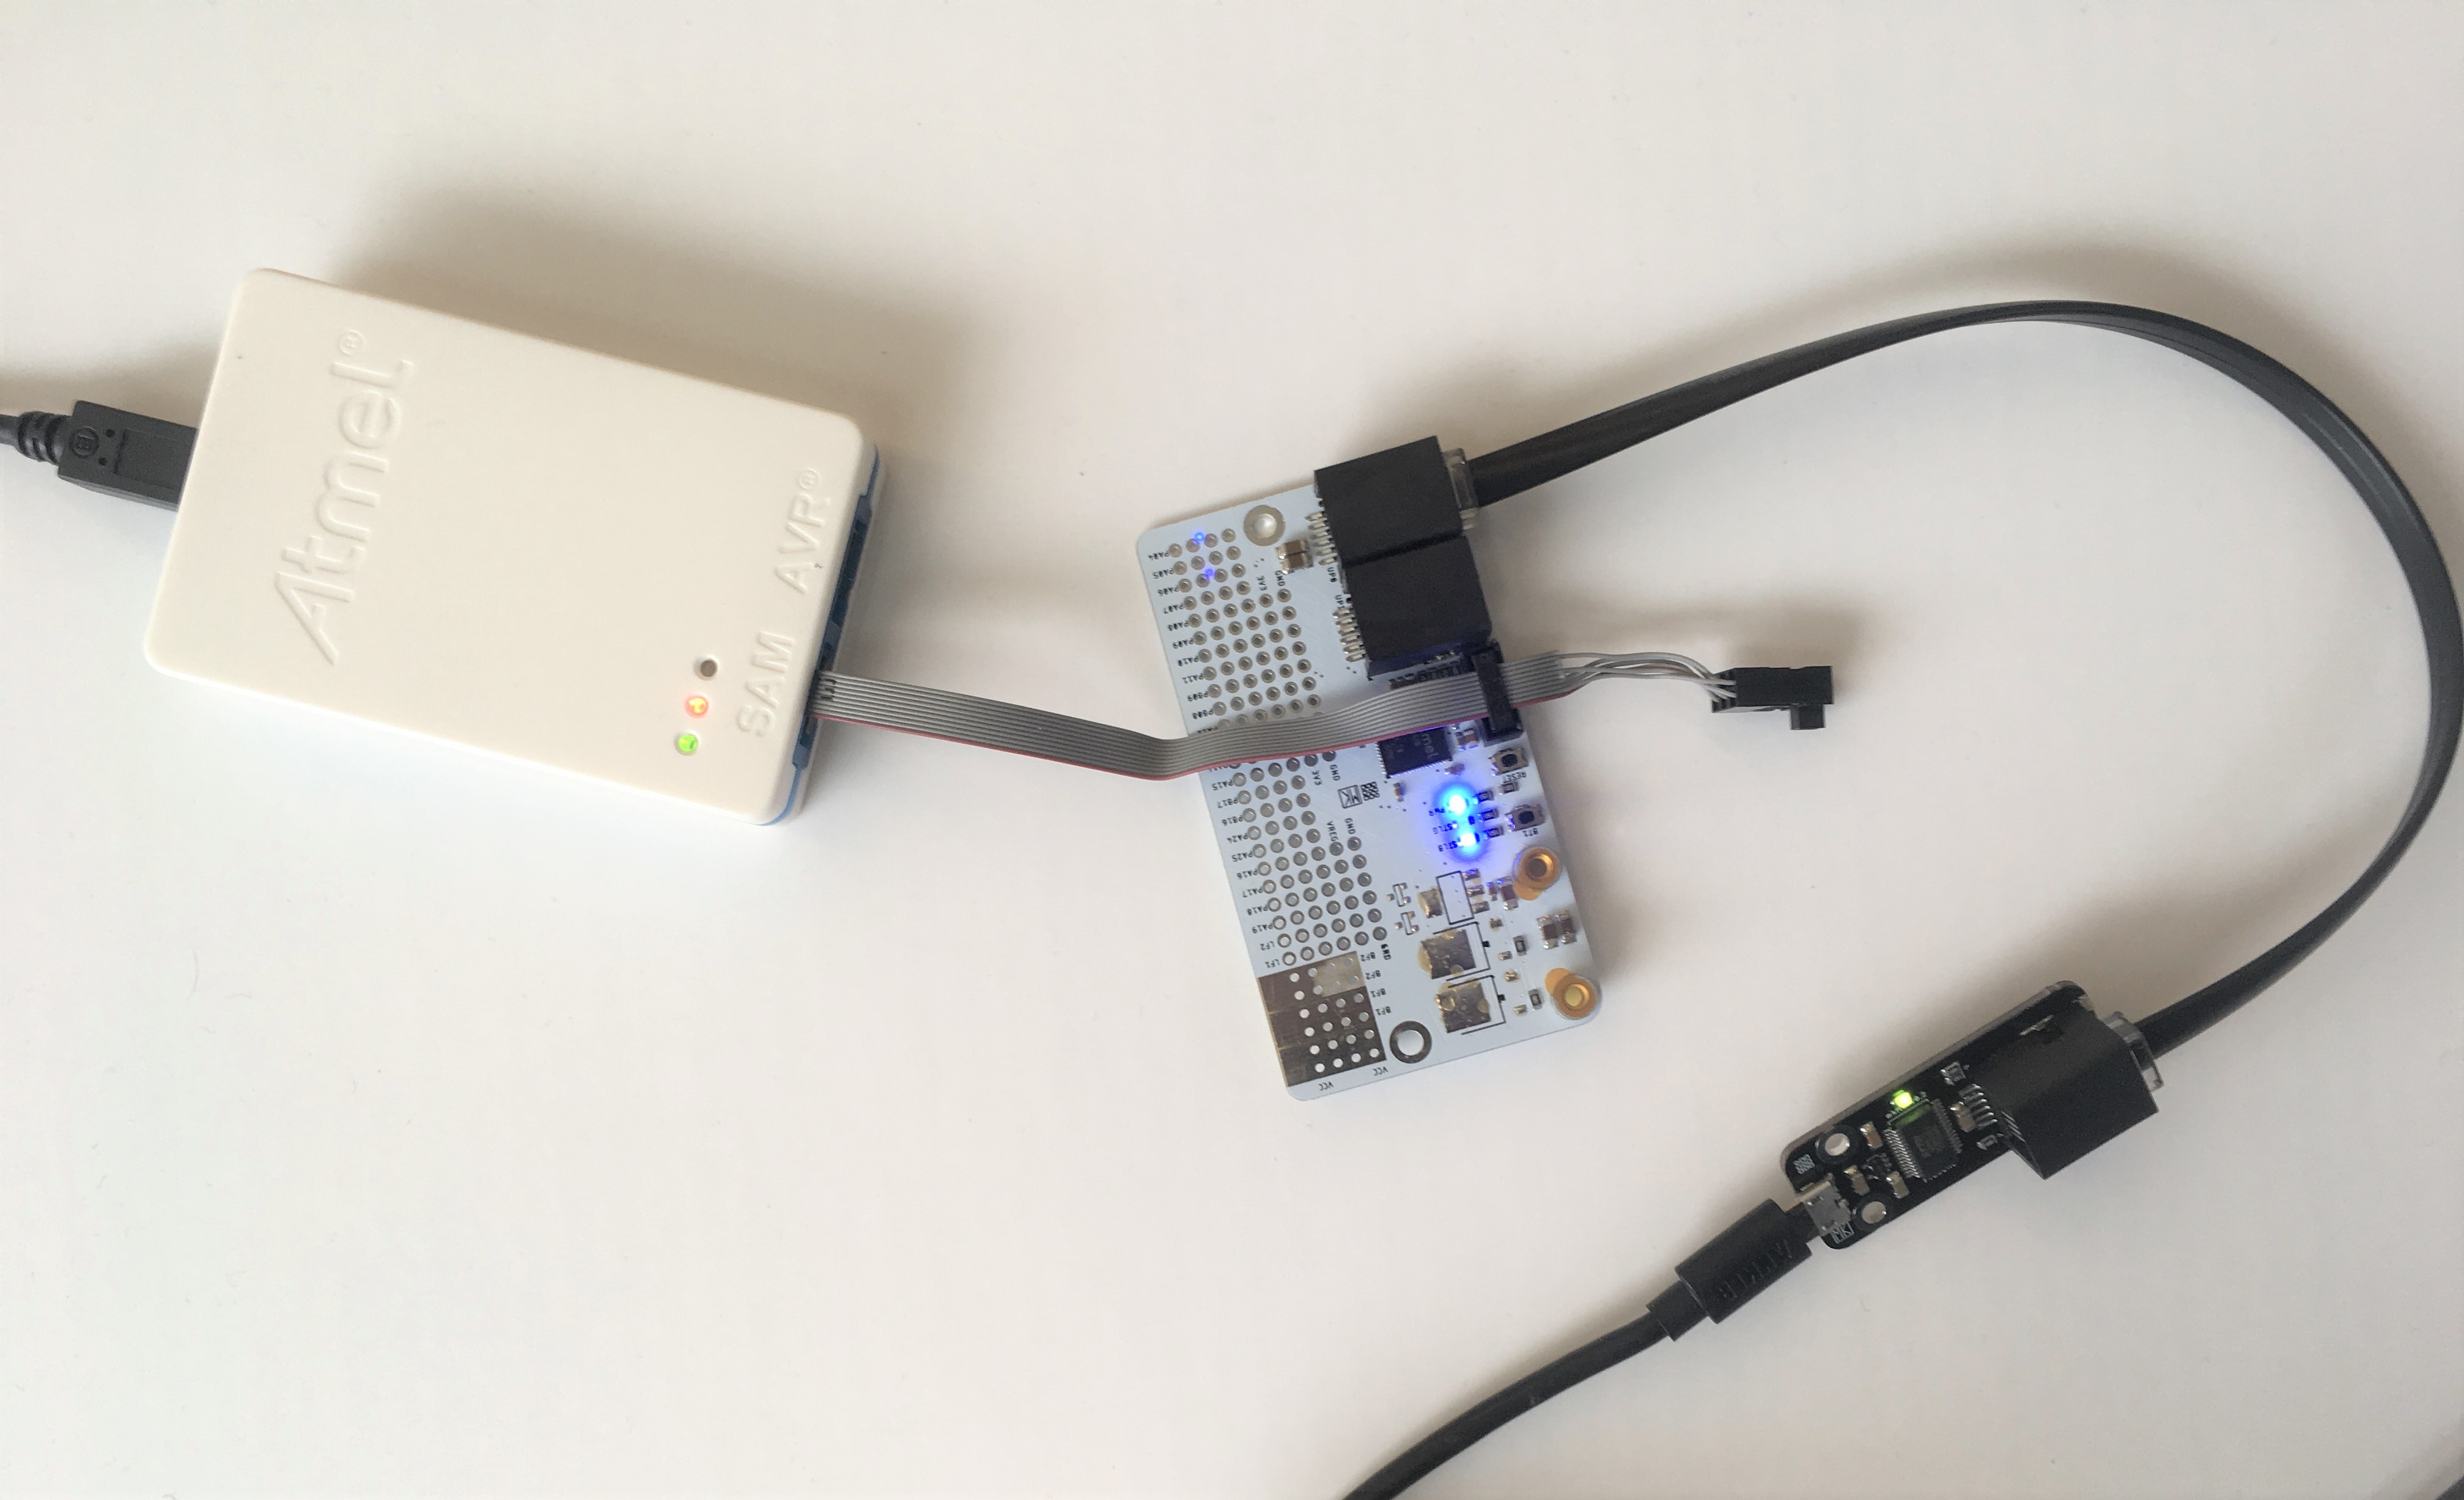
- To make sure the board is working try toggling a pin an LED is on. I'm using an Atmel ICE, which automatically pops up in the drop down. Make sure the BBB is powered via the networking ports. The green LED on the Atmel ICE should light up to tell you the BBB is powered and ready for programming.
 Press start Without Debugging and a window pops up with a tab titled Tools, containing a pull down for Selected Debugger/Programmer. When the code below is Built the STLB LED will blink.

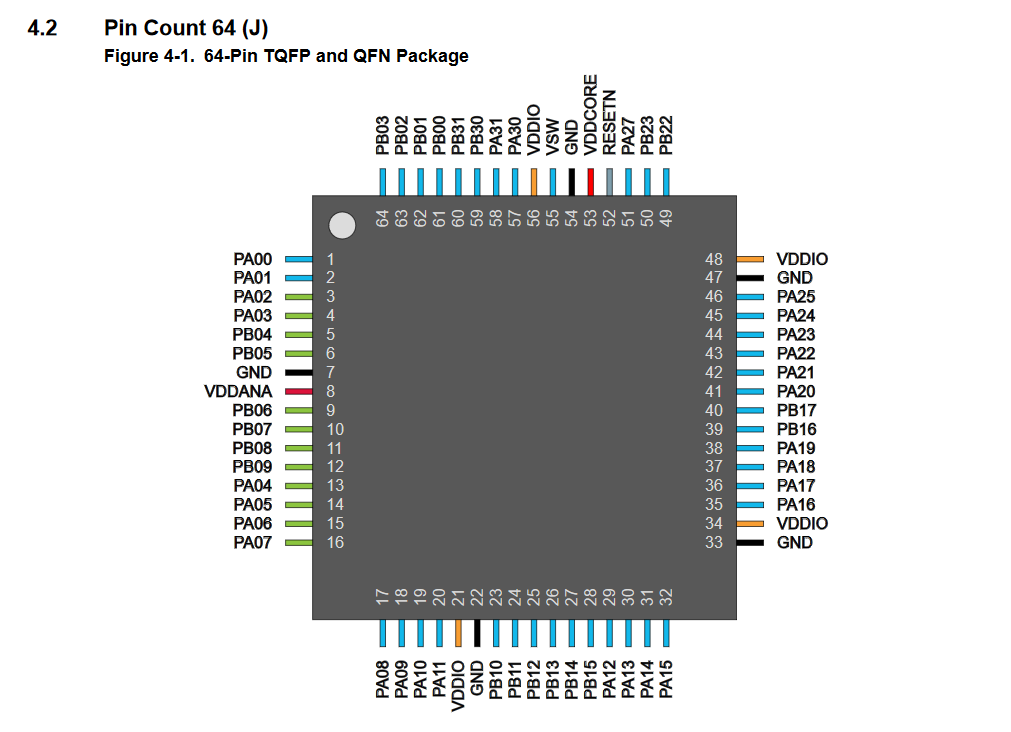
- For my system I need 2 pins reading thermocouple data, via 1-wire, and 2 pins togging a relay to the heater and the motor controlling the auger. Download and look at the BBB eagle files and also the SAM D5 datasheet. This is the 64 pin (J) chip. Below is a copy of the pinout from the data sheet.

- Starting with PA04 for the hockey puck heater relay and the BBB SMT MOSFET on BF2IN (connected to pin PA22) for the motor ON/OFF. Tested them and see they work! The motors and heaters can be turned ON and OFF with this code:
#include "sam.h"
int main(void)
{
SystemInit();
PORT->Group[0].DIRSET.reg = (uint32_t)(1 << 4); //heater relay
PORT->Group[0].DIRSET.reg = (uint32_t)(1 << 22); //BF2IN, motor relay
PORT->Group[0].DIRSET.reg = (uint32_t)(1 << 23); //BF1IN, other MOSTFET (dead on my board)
PORT->Group[1].DIRSET.reg = (uint32_t)(1 << 22); //STLB LED
uint32_t tick = 0;
while (1)
{
if(!(tick % 5000000)){
PORT->Group[0].OUTTGL.reg = (uint32_t)(1 << 4);
PORT->Group[0].OUTTGL.reg = (uint32_t)(1 << 22);
PORT->Group[0].OUTTGL.reg = (uint32_t)(1 << 23);
PORT->Group[1].OUTTGL.reg = (uint32_t)(1 << 22);
}
tick ++;
}
}
- To read the thermocouples I got breakout boards with MAX31850. This chip has cold junction compensation and converts the microvolt analog signal from the TC to a digital signal, which makes my life easier.
MAKE SINGLE WIRE WORK!
- The injection molter should squish a certain about of material into the mold then stop turning. I'll actuate this via a button press, and the turn screw will rotate for a defines length of time. To implement a button with the BBB I'm setting a pin as an input and implementing an internal pullup resistor. When the botton is closed the pin will go to groud, triggering a squence. These lines of code set the pin as input, enable the pullup, andset the pull-up state as HIGH.
PORT->Group[0].PINCFG[5].bit.INEN = 1; //PA05, button as input
PORT->Group[0].PINCFG[5].bit.PULLEN = 1; //enable pull-up
PORT->Group[0].OUTSET.reg = (uint32_t)(1 << 5); //setting the pull-up to HIGH
TIMER
 Press start Without Debugging and a window pops up with a tab titled Tools, containing a pull down for Selected Debugger/Programmer. When the code below is Built the STLB LED will blink.

 Press start Without Debugging and a window pops up with a tab titled Tools, containing a pull down for Selected Debugger/Programmer. When the code below is Built the STLB LED will blink.
